
Transform Your Ride: A Customer-Friendly Guide to HONDA Stabilizer link rod Replacement
Your car is more than just a mode of transportation; it’s your trusted companion on every journey. To keep it running smoothly, regular maintenance is key. One often-overlooked yet crucial component is the HONDA Stabilizer link rod, which plays a vital role in ensuring stability and reducing body roll when cornering. If you’ve noticed some unusual handling issues or noises, it might be time for a replacement. Don’t worry, we’ve got you covered with this easy-to-follow guide!
Why Replace the Stabilizer Link Rod?
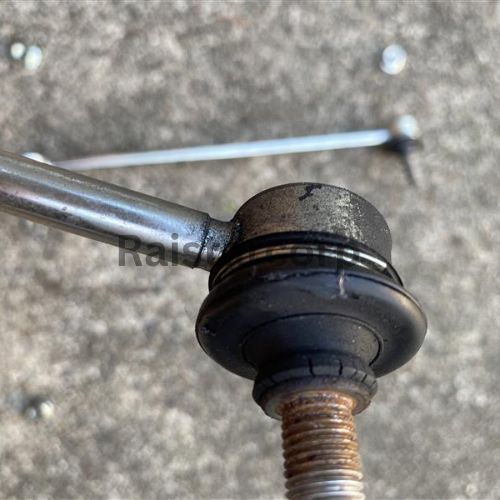
During a routine vehicle inspection, a grease leak was spotted in the boot of the left stabilizer link rod. This prompted a replacement, proving the importance of keeping an eye on your vehicle’s components. Fun fact: With proper care like applying rubber protectant regularly, this part lasted an impressive eight years! This shows how preventive maintenance can save you time and money in the long run.
What You’ll Need: Tools & Parts Checklist
Before diving in, let’s make sure you’re fully equipped. Here’s what you’ll need for a smooth replacement process:
Parts:
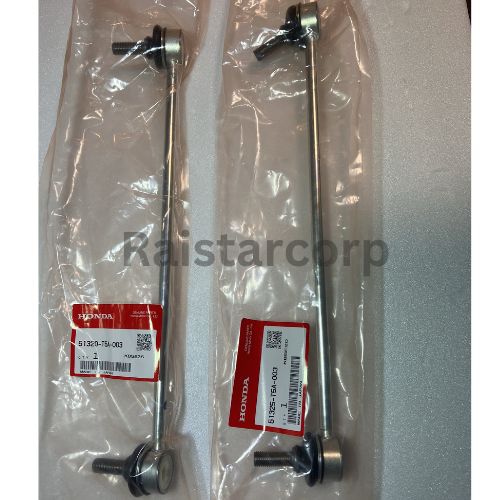
- Right Stabilizer Link Rod: 51320-T5A-003
- Left Stabilizer Link Rod: 51325-T5A-003
- Nuts: Top nut (90002-S10-000 *2) and bottom nut (90306-SB2-013 *2)
Tools:
- Impact Wrench: For that initial tough loosening.
- Hex Wrench: To hold the screw steady.
- 14mm Box Ratchet: To remove the nuts.
- Grinder, Vice Pliers, and File: For those “stubborn nut” moments.

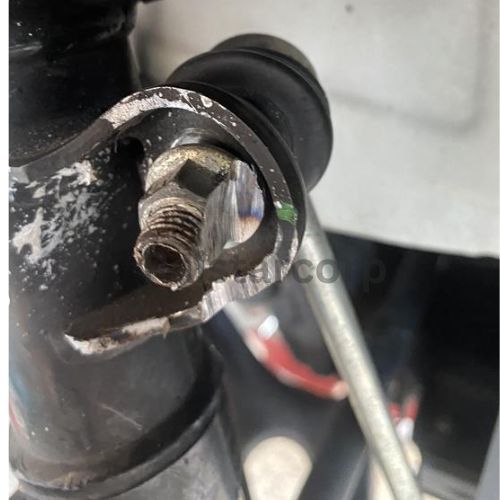
Loosen the Nuts
Start by loosening the nuts using an impact wrench to break the tightness. Then, switch to a hex wrench and a 14mm box ratchet for steady progress. Be prepared lock nuts can put up a fight!
Remove the Old Stabilizer Link Rod
Once the nuts are off, remove the old stabilizer link rod. Double-check the new part to ensure compatibility before moving forward.


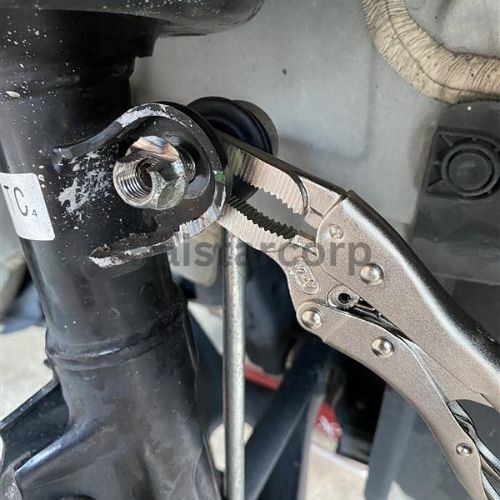
Overcome Challenges Like a Pro
Replacing the left stabilizer link rod is usually straightforward. But the right side? That’s where the fun begins! If the nut is too tight or the hex section gets stripped, don’t panic. Use a grinder to carefully remove the nut (take it slow to avoid damaging nearby components). Vice pliers and a file can also help tackle tricky bolts.
Install the New Stabilizer Link Rod
With the old rod out, it’s time to install the new one. Always use fresh nuts; reusing old ones can lead to breakage under stress. Secure everything tightly, but don’t overtighten.

Protect Your Investment
Extend the life of related components by applying KURE Rubber Protectant to the tie rod end, lower arm ball joint boots, and drive shaft boots. This simple step keeps the rubber flexible and prevents cracking over time.
Pro Tips for Success
- Preventive Maintenance Pays Off: Regularly applying rubber protectant can dramatically extend the lifespan of your car’s components.
- Stick to Genuine Parts: They’re designed for your vehicle, ensuring better fit, durability, and performance.
- Always Use New Nuts: Old nuts can weaken and break, so it’s better to replace them.
- Stay Calm Under Pressure: Stubborn nuts or bolts are common; just be patient and use the right tools.
The Reward: A Smoother, Safer Ride
Replacing the stabilizer link rod might sound intimidating, but with basic tools and a bit of determination, you can complete this task in about an hour. Plus, there’s nothing like the satisfaction of improving your car’s performance and saving on labor costs!
Remember to always follow safety precautions and consult your vehicle’s manual for specific instructions. By taking these steps, you’re not just fixing a part, you’re investing in your car’s future.
Ready to Take the Wheel?
Your car deserves the best care, and so do you. By tackling this maintenance task, you’re ensuring a smoother, safer, and more enjoyable driving experience. So grab your tools, roll up your sleeves, and let’s get started! 🚗✨
If you are interested in purchasing the HONDA Stabilizer link rod, contact us.
Our team is ready to assist you with any inquiries you may have about our products and services. Don’t hesitate to reach out!
To view more repair guides, click this.