
- Maker:-Honda
- Modal:-CR-Z
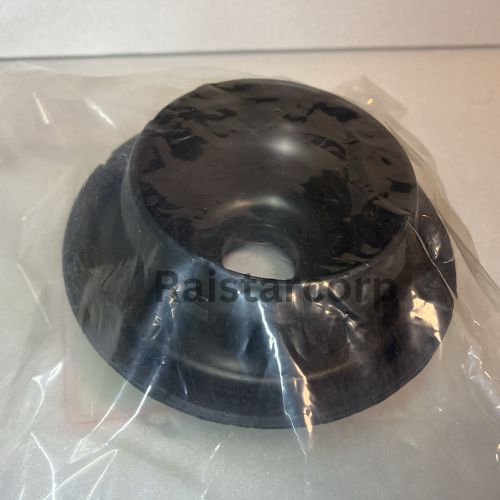
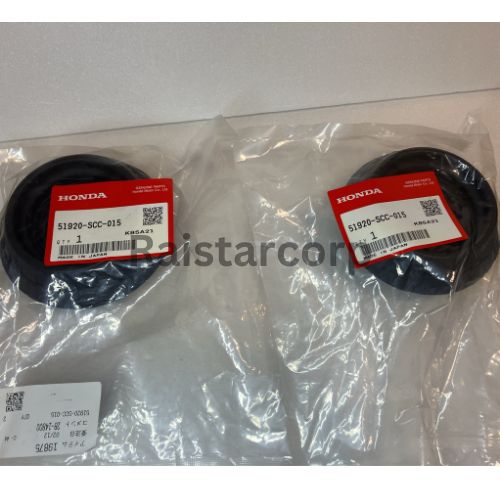
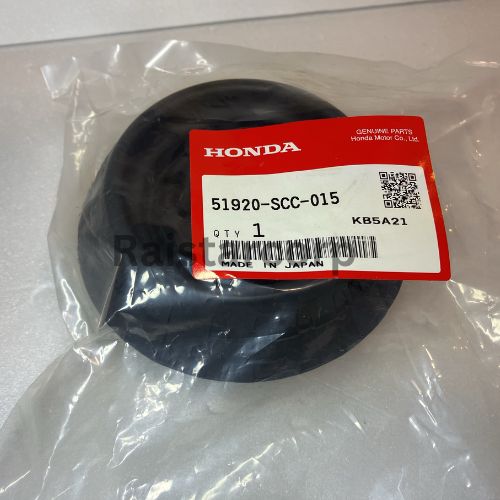
- Part Numbers:-51920-SCC-015
Restoring your Honda’s suspension system to peak performance begins with replacing the shock absorber upper mount. This guide provides a creative, step-by-step walkthrough to help you tackle the replacement process with confidence and precision.
Why Replace the Honda Front Shock Absorber Upper Mount ?
Over time, the upper mount can wear out due to constant pressure and vibrations. A damaged mount can cause:
- Noisy Suspension: Clunks or rattles when driving over bumps.
- Poor Handling: Reduced stability and steering performance.
- Increased Wear: Stress on other suspension components.
Replacing the upper mount restores ride quality enhances safety, and ensures your Honda performs as it should.

Tools and Materials You’ll Need
- Replacement part: Honda Front Shock Absorber Upper Mount (51920-SCC-015)
- Socket wrench set (including a 9mm socket)
- Torque wrench
- Jack and jack stands
- Pry bar
- Trim removal tool
- Safety gloves and goggles
Step-by-Step Replacement Process
Preparation and Safety First
- Park the vehicle on a flat surface and engage the parking brake.
- Use a jack to lift the front of the vehicle and secure it with jack stands.
- Wear safety gloves and goggles to protect yourself during the process.
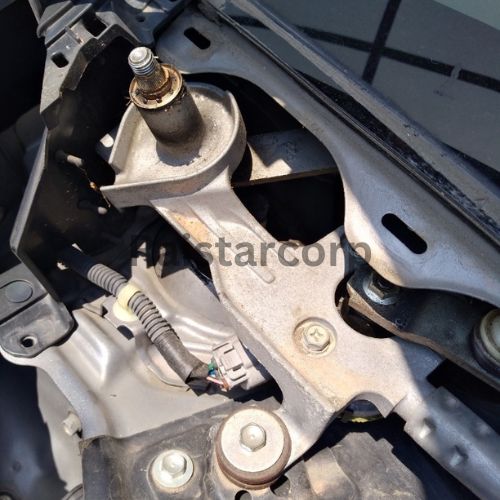
Removing the Front Cowl and Wiper Assembly
- Start by removing the front cowl (the plastic panel near the windshield). Use a trim removal tool to detach the plastic clips carefully.
- Remove the wiper assembly by unscrewing the bolts and holding it in place. This will give you access to the upper suspension mount.
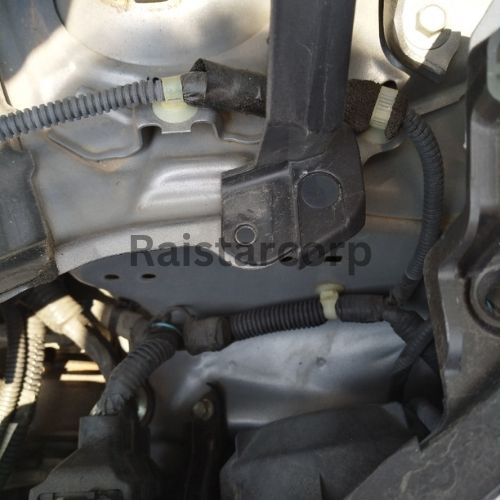
Accessing the Upper Mount
- Locate the upper mount on the shock absorber. On some Honda models, the left mount may be partially obstructed by the wiper motor.
- If necessary, remove the wiper motor by unscrewing its bolts to gain unobstructed access.

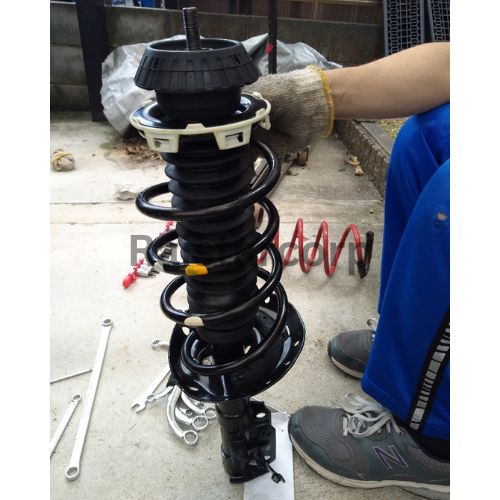
Removing the Shock Absorber Assembly
- Disconnect any sensor wires and the stabilizer mounting part attached to the shock absorber.
- Use a jack to support the shock assembly to prevent strain on the drive shaft.
- Loosen and remove the bolts securing the shock absorber to the knuckle.
- Carefully lower the knuckle and remove the shock absorber assembly.
Replacing the Upper Mount
- With the shock assembly removed, locate the upper mount at the top of the shock absorber.
- Remove the old mount and inspect the surrounding components for wear or damage.
- Install the new Honda Front Shock Absorber Upper Mount (51920-SCC-015), ensuring it is aligned correctly.

Reassembling the Suspension
- Reinstall the shock absorber assembly in reverse order of removal.
- Secure all bolts to the manufacturer’s torque specifications using a torque wrench.
- Reattach the stabilizer mounting part and sensor wires.
Final Steps
- Reinstall the wiper motor (if removed), wiper assembly, and front cowl.
- Lower the vehicle from the jack stands and ensure all components are secure.
Pro Tips for a Seamless Replacement
- Always refer to your vehicle’s repair manual for specific instructions and torque values.
- Inspect related suspension components (e.g., bushings, dampers) during the replacement process.
- Test drive the vehicle after the repair to ensure the suspension feels stable and quiet.
Conclusion
Replacing the Honda Front Shock Absorber Upper Mount is a straightforward process that significantly improves ride quality and handling. By following these steps and using high-quality tools and parts, you can restore your Honda’s suspension to factory standards.
Whether you’re a DIY enthusiast or a professional mechanic, this guide ensures a smooth and safe repair. Happy driving!