
HONDA FUEL FILTER CAP

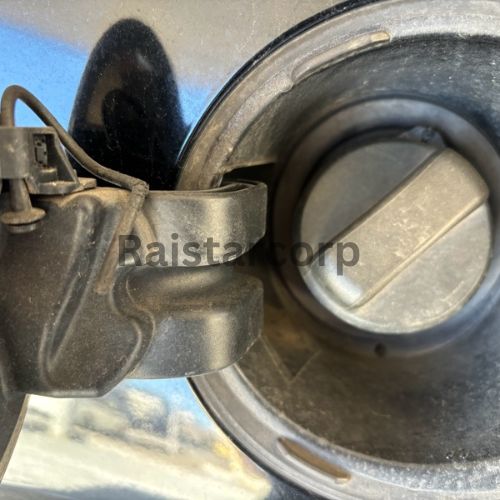
Over time, certain components of a vehicle may wear out or break due to consistent use. One such part is the fuel cap string, which is essential for keeping the fuel cap securely attached to the vehicle. If the string breaks or becomes detached, it is important to replace it promptly to avoid potential issues. This guide provides a detailed explanation of how to replace a broken fuel cap string with a genuine replacement part.
Identifying the Issue
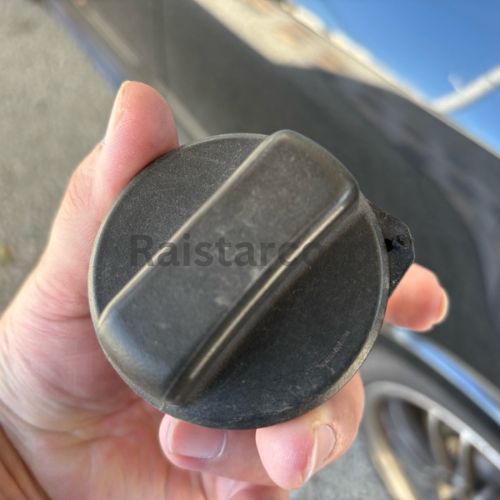
After years of use, the string that holds the fuel cap may break or become completely detached. In some cases, the string may be severed entirely from its root, rendering it unusable. When this occurs, it is advisable to replace the fuel cap and string assembly with a stable and genuine part to ensure proper functionality.
Required Replacement Part
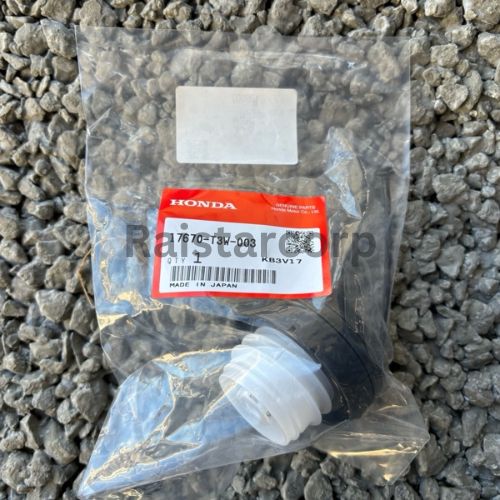
For this replacement, it is recommended to use the genuine part specified for your vehicle. The part number for the replacement HONDA FUEL FILTER CAP is 17670-T3W-003. Using an authentic part ensures compatibility and durability.

Preparation
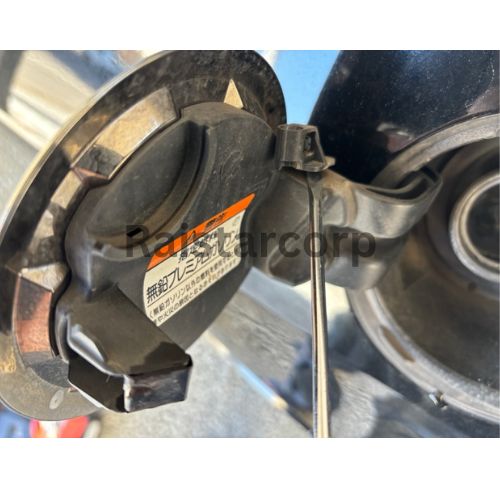
Begin by gathering the necessary tools for the replacement process. An interior trim remover or a flathead screwdriver will be required to remove the old components.
Removing the Old String
Locate the part that secures the existing fuel cap string. This component is typically fixed in place but can be easily pried off using an interior trim remover or a flathead screwdriver. Carefully remove this part without applying excessive force.

Separating Components
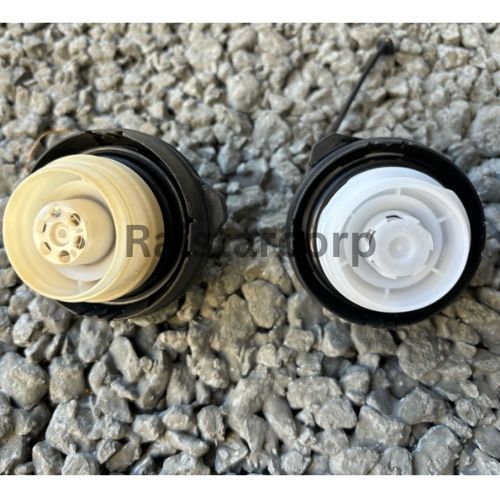
Once the securing part is removed, separate the components of the old fuel cap assembly. Be cautious when splitting the shell, as it may pop open unexpectedly. Pay close attention to the orientation of the components to ensure proper reassembly later.
Installing the New String
Insert the new string into the appropriate position within the fuel cap assembly. Ensure that it is aligned correctly to prevent any issues during reassembly.

Reassembling the Fuel Cap
Reassemble the components in reverse order, ensuring that each part is securely fitted in place. Double-check that the string is properly attached and that the fuel cap functions as intended.
Final Inspection
After completing the replacement process, inspect the new fuel cap assembly to confirm that it is securely installed and operational. Test its functionality by attaching and detaching the fuel cap to verify that the string remains intact.
Conclusion
Replacing a broken fuel cap string with a genuine part not only restores functionality but also enhances the overall appearance of your vehicle. The process is straightforward and can be completed with minimal tools and effort. By following these steps, you can ensure that your fuel cap remains secure, providing peace of mind and maintaining the integrity of your vehicle’s fuel system.
Having a new and stable fuel cap assembly feels satisfying and contributes to the long-term maintenance of your vehicle.
Stay safe and drive with confidence!