
- Maker:-NISSAN
- Modal:-CARAVAN
- Part Numbers:-38440-N3111
Upgrading your Nissan Caravan E25 with an R200 Nismo mechanical limited-slip differential (LSD) and replacing the wheel bearings (Part No. 38440-N3111) is a rewarding task for automotive enthusiasts. This guide walks you through the process step-by-step, ensuring a smooth installation and optimal performance.
Required Parts and Materials
Before you begin, gather the following parts and tools:
- Side Bearings (2 pcs) – Part No. 38440-N3111
- Differential Gasket – Part No. 43232-42G10
- Hub Seals (2 pcs) – Part No. 38320-Y0812
- Differential Oil – WAKO’S RG6140 LSD (2 liters)
- Standard automotive tools, including a torque wrench, jack stands, and a hydraulic lift (if available).


Preparation
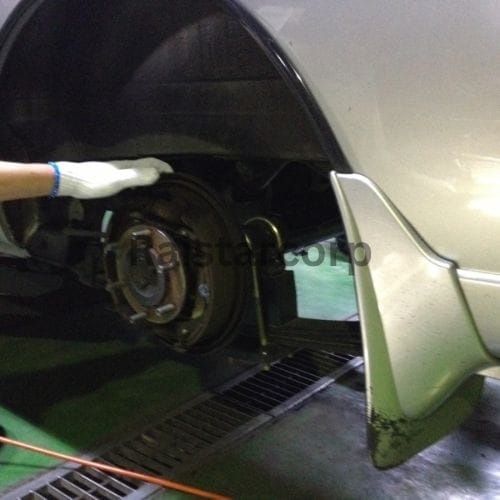
- Lift the vehicle securely using a hydraulic lift or jack stand. Double-check for stability before working underneath.
- Remove the rear tires and brake drums. Inspect the brake lining for wear; if it’s in good condition (as it was in this case at 167,606 km), you can proceed without replacement.
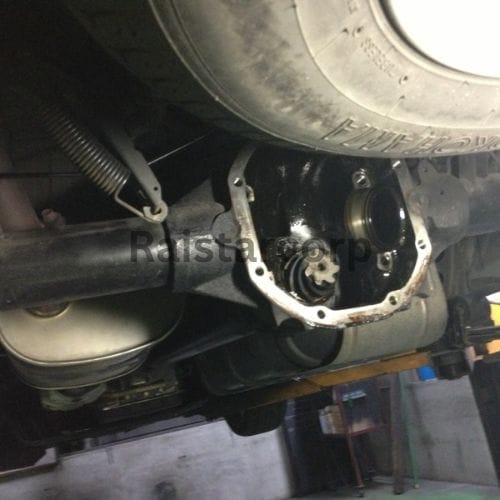
- Drain the differential oil completely to prevent spills during the procedure.
Removing Components
- Disconnect the ABS sensor and brake line to access the hub and axle assembly.
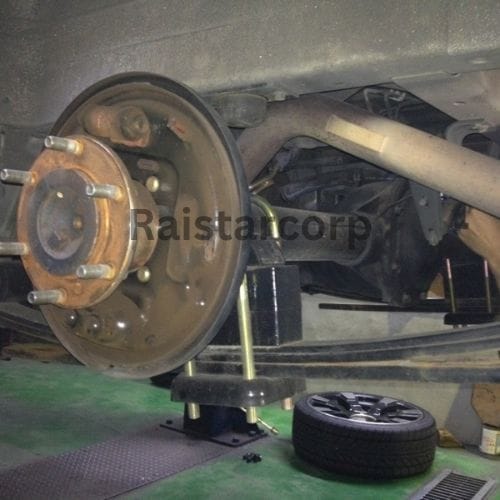
- Use a 17 mm socket to remove the four nuts securing the hub assembly. Carefully extract the drive axle.
- Note: ABS-equipped vehicles use double tapered roller bearings, while non-ABS models may have ball bearings or tapered roller bearings.

Verifying LSD Compatibility
- Confirm the compatibility of the R200 Nismo LSD with the drive axle spline and diameter. For the Nissan Caravan E25, the specifications are 30 mm x 29 mm.
- Test-fit the LSD onto the shaft to ensure proper alignment and fitment. In this guide, the LSD fit perfectly, confirming compatibility.
Accessing the Differential
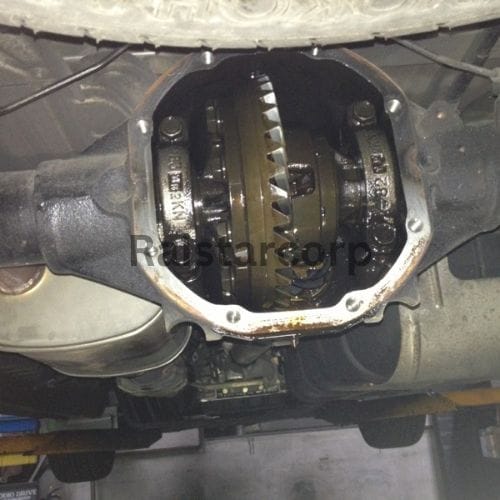
- With the axle removed, unbolt the eight fasteners securing the differential cover. Remove the cover to expose the open differential.
- If a spare tire is mounted nearby, ensure it doesn’t obstruct your workspace. Remove it if necessary.
Removing the Open Differential
- Unscrew and remove the bearing caps on both sides of the differential housing. Take note of their positions for reassembly.
- Carefully extract the differential body from the housing. Pay attention to the placement of shims adjacent to the side bearings for accurate reinstallation.

Cleaning and Preparation
- Clean the differential housing and all related components thoroughly to remove old oil and debris. This ensures a clean installation and prevents contamination.
Installing the R200 Nismo Mechanical LSD
- Press the new side bearings (Part No. 38440-N3111) onto the LSD unit.
- Position the LSD into the differential housing. Align it correctly with the shims and bearing caps.
- Secure all bolts and reinstall the differential cover using a new gasket (Part No. 43232-42G10).
Reassembling Components
- Reinstall the drive axle, ensuring it fits securely into the hub assembly.
- Reconnect the brake lines and ABS sensor, ensuring all connections are tight and secure.
- Reattach the brake drums and rear tires.
Refilling Differential Oil
- Fill the differential with WAKO’S RG6140 LSD oil (approximately 2 liters). Using high-quality LSD oil is essential for maintaining optimal performance and longevity.
Conclusion
By following this guide, you can confidently replace the wheel bearings and upgrade your Nissan Caravan E25 with an R200 Nismo mechanical LSD. This upgrade enhances traction and improves driving dynamics, especially in challenging conditions.
Always double-check that all bolts are torqued to manufacturer specifications. After completing the installation, take your vehicle for a test drive to ensure all components are functioning correctly.
Pro Tip: Keep a maintenance log of the parts replaced and the mileage. This can be helpful for future reference and resale value. Enjoy your improved driving experience!