
SUZUKI GEAR BOX OIL STRAINER

Replacing the SUZUKI GEAR BOX OIL STRAINER and body filter is essential for maintaining the health and performance of your vehicle’s transmission. These components filter out dirt, debris, and metal particles from the CVT fluid, ensuring smooth fluid flow, proper lubrication, and cooling of the transmission. Over time, clogged or worn filters can lead to poor gear shifting, overheating, and increased wear on critical components, potentially causing costly damage or failure. Regular replacement prevents these issues, extends the life of the CVT system, and ensures reliable, efficient operation, especially for vehicles with unknown maintenance histories.
Essential Tools:
- Floor jack
- Torque wrench
- Replacement parts
Safety Precautions:
- Use jack stands (often called “horses”) to secure the vehicle.
- Alternatively, position the jack between the tire and sufficient clearance to prevent injury in case of jack failure.

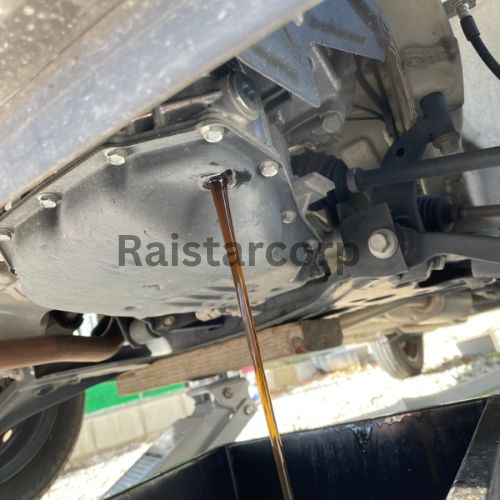
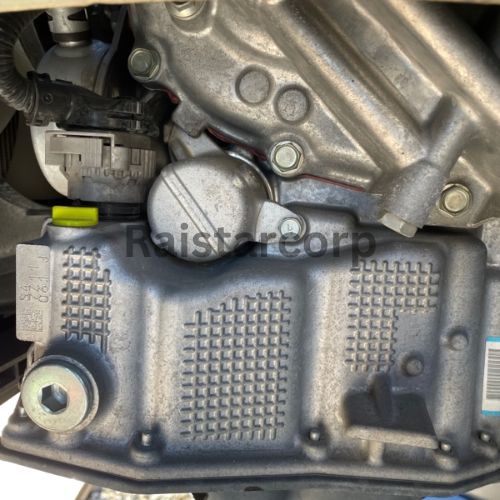
Draining the CVT Oil
- Action: Drain the CVT oil through the drain bolt.
- Torque Specification: Tighten the bolt to 34 Nm upon reinstallation.
- Safety Tip: Secure the vehicle with appropriate equipment.
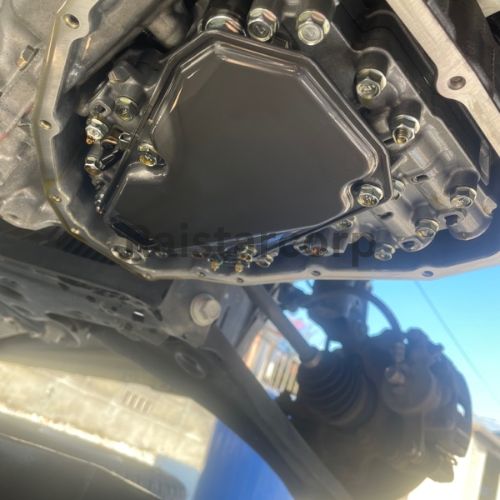
Removing the Oil Pan
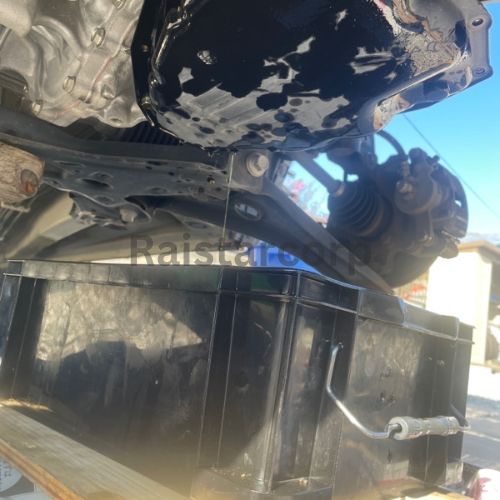
- Action: Loosen the oil pan bolts, keeping one side slightly attached to tilt the pan for gradual oil drainage.
- Tip: Lightly tighten the drain bolt during this step to avoid accidental spillage.

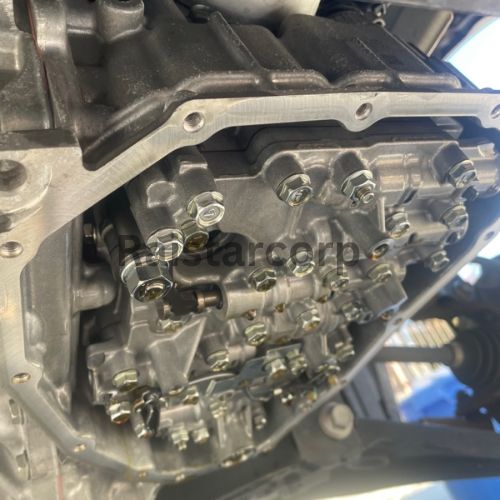
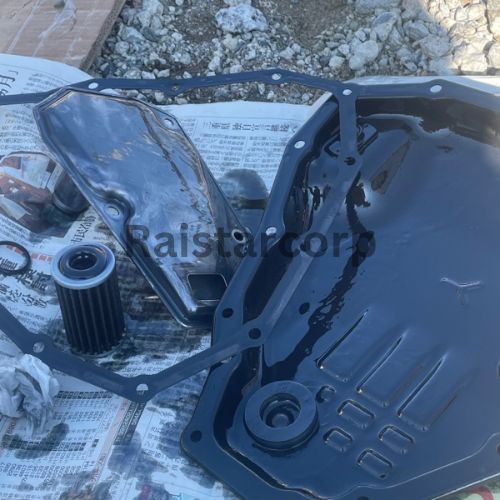
Removing the Strainer
- Action: Locate the strainer, secured by three bolts, and remove them carefully.
- Torque Specification: Reinstall the strainer with a torque of 7.9 Nm.
- Note: Handle the strainer gasket carefully during removal and reassembly.
Strainer Part Numbers:
- Suzuki: 26572-72MA0
Replacing the Valve Body Filter
- Action: Access the valve body filter by removing the tire and plastic inner lining on the vehicle’s left side.
- Tip: The filter is secured with a single 10 mm bolt and hooked onto a claw on the transmission. Avoid forceful removal.
- Torque Specification: Tighten to 7 Nm during reinstallation.

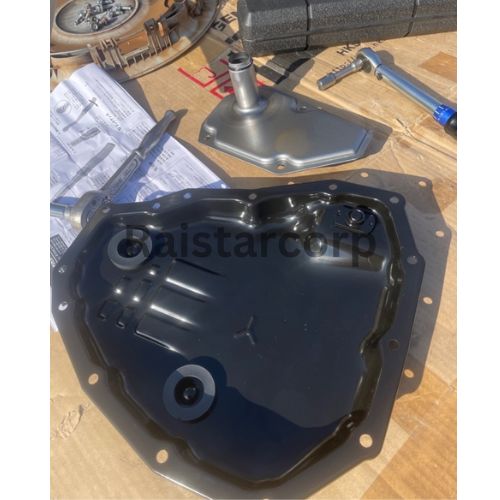
Inspecting and Cleaning Components
- Action: Inspect the removed oil pan, strainer, and body filter for debris or sludge.
- Tip: Clean reusable components, such as the oil pan, with tissue and parts cleaner before reassembly.
Oil Pan Gasket Part Numbers:
- Suzuki: 24762-82KA0
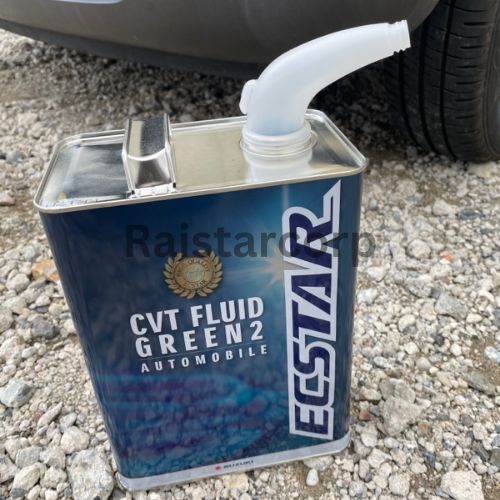
Refilling CVT Oil
- Recommendation: Use Suzuki genuine green oil to ensure compatibility.
- Capacity: Total oil capacity is 5.7 liters; approximately 3.4 liters will be discharged during this process.
- Procedure: After refilling, start the engine and shift through all gear positions twice to ensure proper fluid distribution. Add approximately 3.7 liters, then recheck levels after driving.
Final Notes
Regular maintenance is key to optimal vehicle performance. While amateur maintenance may not allow for pressure replacement of CVT fluid, periodic replacement of discharged amounts is advisable. Consider replacing drained fluid annually to maintain system health.
By following these steps, you can ensure your vehicle’s CVT system remains in excellent condition for years to come.
If you are interested in purchasing the SUZUKI GEAR BOX OIL STRAINER, contact us.
Our team is ready to assist you with any inquiries you may have about our products and services. Don’t hesitate to reach out!
To view more repair guides, click this.