
- Maker:-Toyota
- Modal:-Hilux/Hiace
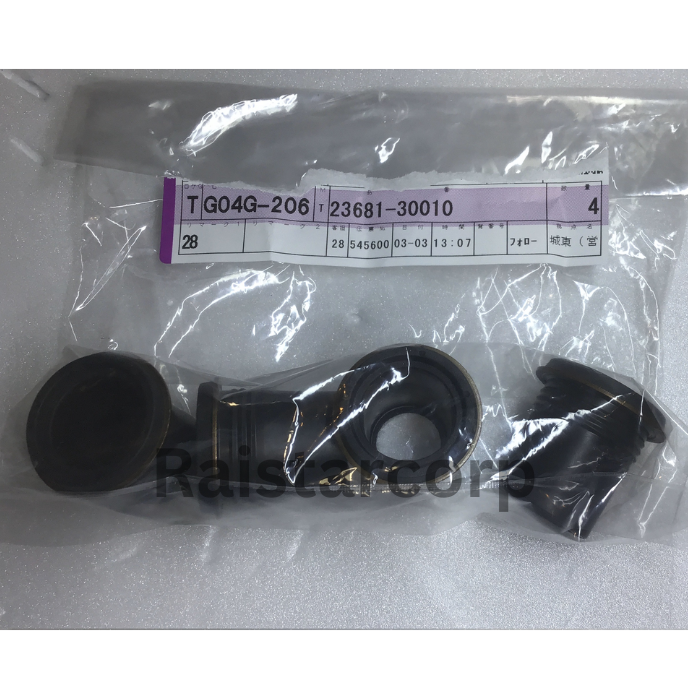
- Part Numbers:-23681-30010
This guide provides step-by-step instructions for replacing the Toyota Oil leak Nozzle seal (Part Number: 23681-30010) to address engine oil leaks in Toyota vehicles, specifically the 2nd generation late 3.0L Hiace 4WD KDH206V model. Replacing this seal prevents oil leaks and ensures optimal engine performance.
Why Replace the Nozzle Seal?
- Prevents Oil Leaks: Stops oil from leaking around the injector area.
- Maintains Engine Performance: Ensures injectors function properly, avoiding power loss and inefficiency.
- Protects Components: Prevents oil contamination of nearby parts.
- Cost-Effective Maintenance: Simple, inexpensive fix compared to costly engine repairs.
Maintaining your vehicle’s engine is essential for ensuring its longevity and performance. One common issue faced by many vehicle owners is engine oil leaks, often caused by worn or damaged seals. This guide provides a step-by-step process for replacing the injector nozzle seal on a 2nd generation late Hilux/Hiace, a simple yet effective solution to prevent or resolve oil leaks.

Toyota Oil leak Nozzle seal
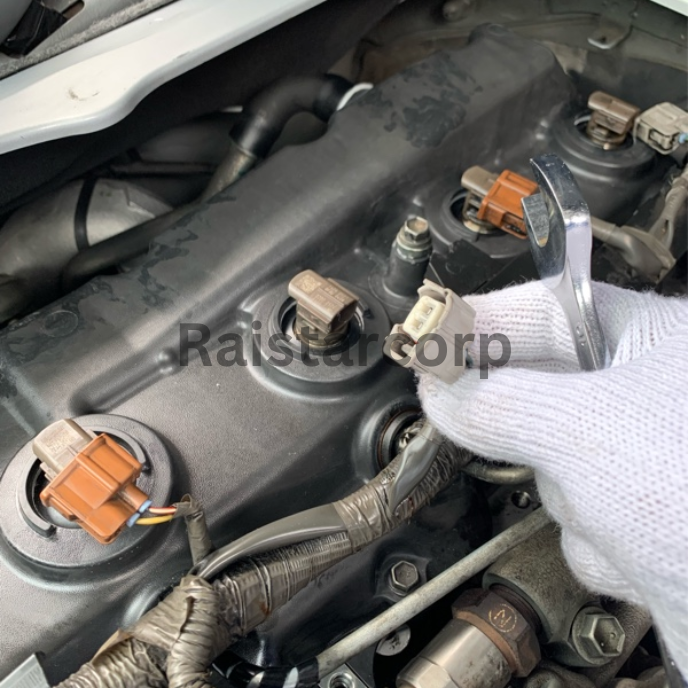
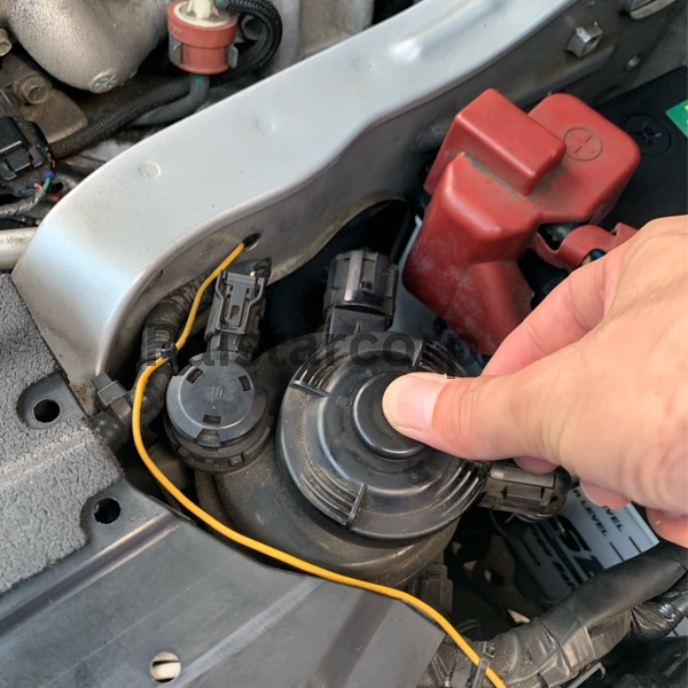
Remove the Injector Couplers
Start by disconnecting the four injector couplers. This step provides clear access to the injector nozzle seals and ensures safe handling during the repair.
Detach the Fuel Pipe
Using a 17mm wrench, carefully remove the fuel pipe connected to the injectors. Handle this component with care to avoid damaging adjacent parts

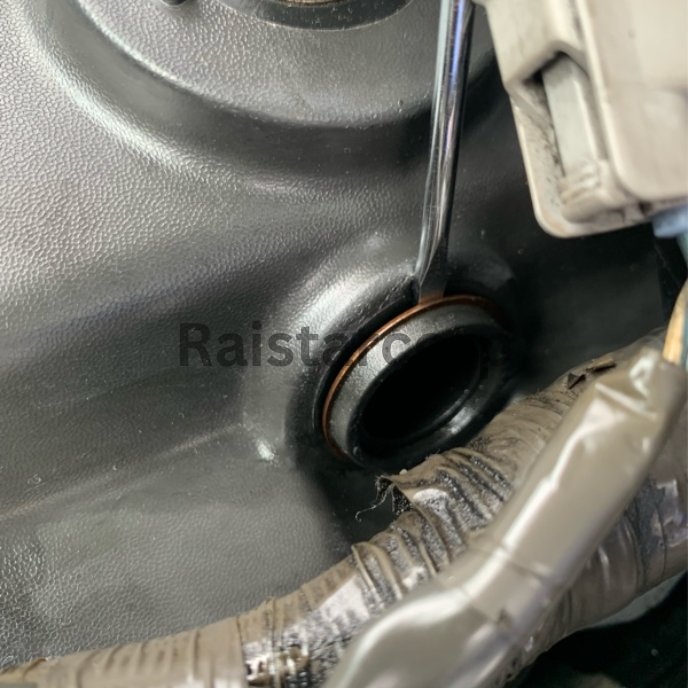
Remove the Old Nozzle Seal
Use a flathead screwdriver to remove the old nozzle seal. Locate the designated groove for the screwdriver, insert it, and gently lift the seal to pop it off. Avoid applying excessive force.
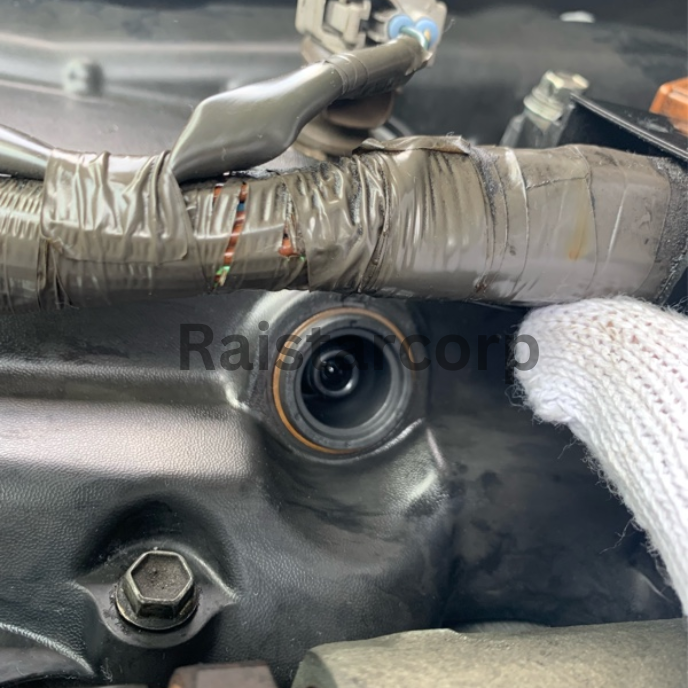
Clean and Install the New Nozzle Seal
Thoroughly clean the area around the injector to ensure a proper fit for the new seal. Once cleaned, install the new nozzle seal by hand. This process is straightforward and does not require any special tools.
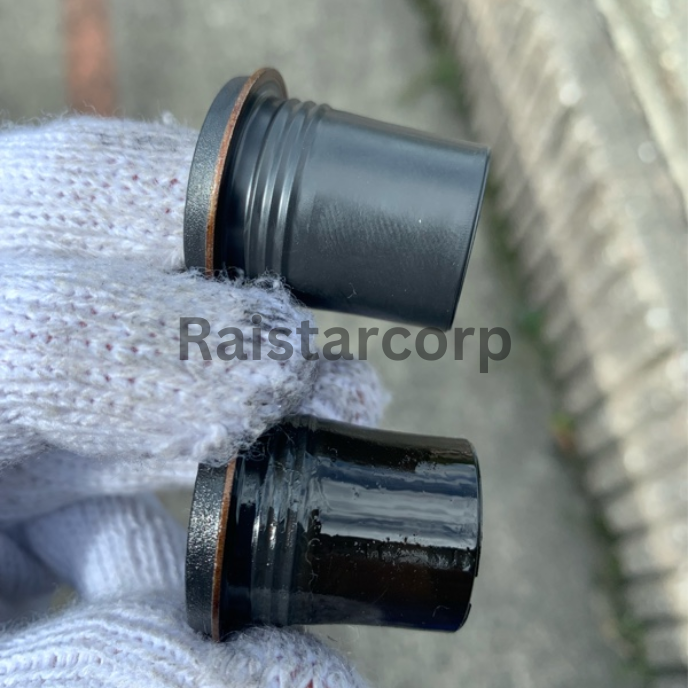
Compare the Old and New Seals
Inspect the old and new seals side by side. Over time, seals harden and degrade due to wear and tear, as was evident in this case after 190,000 kilometers of use. While the wear may not always be visible, replacing these seals during related maintenance tasks (such as head cover replacement) is highly recommended to avoid future leaks.

Reassemble Components
Reattach all removed components, including the fuel pipe and injector couplers. Ensure everything is secured properly before proceeding to the next step.
Post-Replacement Procedure
After reassembling all components, it is essential to prime the fuel system:
- Pump the fuel several dozen times until the system becomes firm.
- When starting the engine, it may not start immediately. Continue turning the starter for approximately six times longer than usual, and the engine should eventually start.