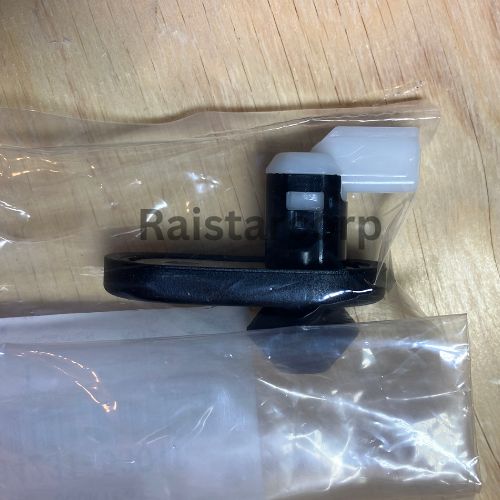
Replace worn-out lower arm bushings without a hydraulic press and eliminate the noise caused by deteriorated rubber bushings.
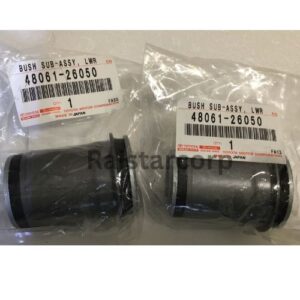
Revitalize your Toyota’s performance by replacing the worn-out lower arm bushings. This comprehensive guide will help you replace them without the need for a hydraulic press. By doing so, you can restore smoother rides and eliminate unwanted noise caused by deteriorated rubber bushings.
Problem & symptoms
- Creaking noise caused by worn lower arm bushings
- Unwanted noise caused by deteriorated (hardened) rubber bushings
Possible causes
- Worn-out, deteriorated or hardened rubber bushings in the lower arm.
Tools & materials
Tick items off as you gather them.

Safety & cautions
Park on a flat surface and secure the vehicle with jack stands for safety.
Allow the bushing to settle under 1G load (the vehicle’s natural weight) before tightening the lower arm cam bolt.
Avoid removing the lower arm ball joint to save time and effort.
Step-by-step instructions
Prepare your vehicle
- Park on a flat surface.
- Secure the vehicle with jack stands for safety.
- Remove the wheels to access the lower arm assembly.
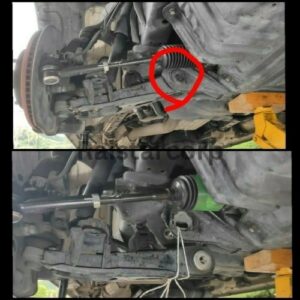
Locate the bushings
- Identify the front bushings on both sides of the lower arm (refer to the diagram if available).
- Double-check that you have the correct replacement bushings before starting.
Remove key bolts
Carefully remove the following bolts to prepare for SST installation:
- Cam bolt
- Lower shock bolt
- Strut bar bolts (x2)
Pro tipAvoid removing the lower arm ball joint to save time and effort.
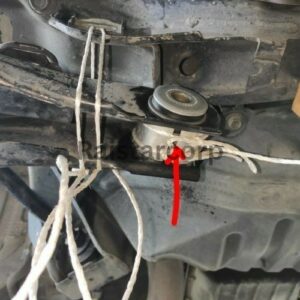
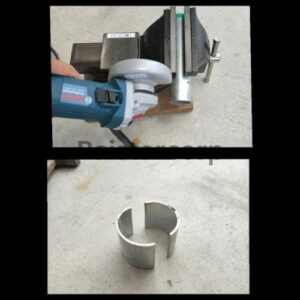
Create a DIY SST
If you don’t have an official SST, you can make one:
- Use a 2 mm thick aluminum pipe with a 45 mm outer diameter.
- Cut it to the desired size using a grinder or high-speed cutter. Precision is crucial for proper fit.
Secure the SST
- Attach the SST to the lower arm at the L-shaped cross-section to prevent deformation during the process.
Remove the old bushings
- Set up your SST for bushing removal.
- If your SST kit doesn’t include a 42 mm diameter pipe, use an appropriate extension pipe.
- Tighten the nut on the SST until you hear a click, indicating the bushing has been successfully removed.
Install the new bushings
- Align the new bushing with the lower arm.
- Use a pipe with a 50 mm inner diameter to press the bushing into place.
- Tighten the SST until the bushing is securely installed.
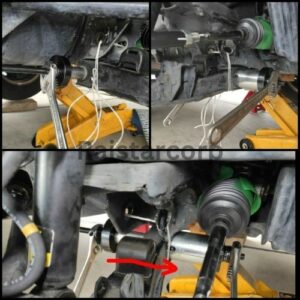
Reassemble and adjust
- Reinstall the cam bolt, lower shock bolt, and strut bar bolts.
- Allow the bushing to settle under 1G load (vehicle’s natural weight) before tightening the lower arm cam bolt.
- Torque all bolts to their specified values.
Lower arm cam bolt 170 N·m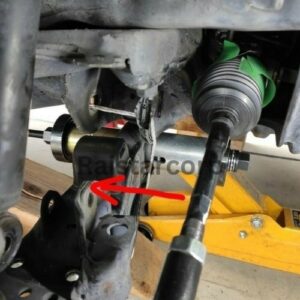


Post-replacement checklist
- Take your car for a test drive to assess the ride quality.
- While immediate improvements may not be dramatic, replacing hardened bushings prevents future issues and maintains vehicle integrity.
Key observations
- Noise reduction: the annoying creaking sound caused by worn bushings is gone.
- Preventative maintenance: while the ride quality may not feel drastically different right away, replacing old bushings extends the lifespan of your suspension system.
- Additional repairs: consider replacing strut bar bushings for enhanced steering and overall performance.
Cost breakdown (author’s figures at time of writing)
- Bushings (left & right): 30 USD (part no. 48061-26050)
- SST for removal/installation: 109 USD
- DIY SST materials: 6 USD (aluminum pipe)
Why choose this method?
- Cost-effective: save money by skipping the hydraulic press.
- Safe & reliable: designed for precision and durability.
- DIY-friendly: a rewarding project for advanced DIY enthusiasts.
Before you start: this guide describes the author’s own repair. Always confirm the part number for your exact vehicle, and if you are unsure, consult a professional.